Tuesday, August 6, 2013

Making Elder Lemonade

I recently had the chance to help make a really bad situation a little less bad...

Some of you may be familiar with a recent Kickstarter gone bad - The Doom That Came to Antlantic City. I was a backer of the project, to the tune of $500. If you'd like all the gory details (at least those that are to be had), you can surf over to the page and read the updates and comments. In short, however, the project leader slowly stopped providing useful updates, and after a year, suddenly posted an update stating that the project was cancelled for lack of funds. This project was overfunded by a factor of nearly 4, so the backers are all left wondering where the money went and why absolutely nothing was produced.

Some backers, including myself, wondered how the game's creators (Keith Baker and Lee Moyer) could have allowed this to happen. Keith published a long explanation on his blog, explaining that the project leader Erik Chevalier licensed the game from them. Because of the nature of Kickstarter, they didn't have the relationship that would have existed with a more traditional publisher. At this point then, we are all left waiting for Erik to make clear how the project failed. Essentially, the backers were pretty sure that their money was gone, and that nothing would ever be produced. Ah, but the story doesn't end there....

Keith and Lee, with the rights back in their hands, produced a print and play version of the game. Within a week, they had provided it to the backers for download, What's more, they allowed the backers to give the game away in print and play form. In another surprise development, Cryptozoic Entertainment purchased the rights to the game, and announced that they would be publishing it. They also announced that all the backers would receive copies of the commercial game upon publication at no charge.

Once the print and play was available, I grabbed it and started printing it out. Even in this rudimentary form, the game is really beautiful. As I printed the board and cards, I realized that an essential component was still missing - the plastic playing pieces!


The Doom That Came to Atlantic City (from the PnP Rule Book)

Houses and Resorts I could get by stealing similar pieces from my Monopoly game, but what could I use for the tentacles and cultists? 3D printing to the rescue!

I studied the rule book, and re-created the pieces in Autodesk's 123D Design. A quick export to .STL format, and some test printing to verify size and appearance. Voila! handmade game pieces!
 

3D models of the cultist and tentacle pieces


...and their printed counterparts!
 As a gesture of gratitude for the work put into salvaging something from all of the carnage that was this particular Kickstarter, I sent the first printed set of pieces to the game's designer Keith Baker. Keith, you can put down the zombie clowns now...

The files are publicly available at:


Thanks again to Keith and Lee for making the extra effort to support the folks who backed the game. Thanks also to Cryptozoic Entertainment, for making sure this amazing work will actually see the light of day in commercial form. Thanks also all of you for allowing me to contribute in a small way to making this experience a little less unpleasant!


Wednesday, July 3, 2013

And now for something not completely different...

I ran across a pair of videos that I found completely engrossing, and thought they were worth sharing.

As part of what I do (when I'm not doing what I do for money), I have completed a few sign commissions. They've been relatively simple metal pieces cut with a plasma cutter. As such, they require just a bit of drawing skill and some elbow grease. I don't consider myself an artist, but a tinker. On the other hand, these two short films showcase two art forms that I'd love to learn, but haven't yet.

The first film showcases David Smith, an English sign maker of some renown. David specializes in glass signs in the Victorian mold, and he excels at his craft.


David A Smith - Sign Artist from Danny Cooke on Vimeo.

The second is a short documentary on glass blowing by Bert Haanstra that won the 1959 Oscar in its category (thanks IO9). Glass blowing has been on my bucket list of skills to learn for a few years now, ever since I took a trip to Seattle and toured some of the schools located there. WOW. This film contrasts the art of the blower with the mechanical marvel that is glass production.


Hope you enjoy them as much as I did.

Sunday, June 16, 2013

Rondo!

OK, today we take the next step in creating the Space Marine™Mark VII helmet - Rondo!

I have to admit, when I read that term the first time I was a bit confused. I wondered why you'd pour this

Rondo - Slam it Down!

into a helmet and expect anything good to happen. This unfortunately dates me as a child of the 60s & 70s. Rondo for our purposes today is a combination of fiberglass RESIN and BONDO body putty. The resulting mixture pours easily, but sticks to what it touches, cures relatively rapidly, and forms a nice hard shell.

Here's all my material gathered together and ready to mix:


Presentation is everything

We need:
  • The art object in question
  • A mixing board - I found some cheap poly boards at a local grocery store (6 for $4!)
  • A selection of bondo putty applicators
  • A putty knife for scooping out bondo from the can
  • A mixing cup
  • Bondo repair putty and hardener
  • Fiberglass resin and hardener
Mixing up Rondo is a bit of black magic, as everyone has their own recipe. For this project I mixed:
  •  A baseball size lump of Bondo
  •  3/4 of the Bondo hardener that the instructions call for
  •  3 oz of fiberglass resin
  •  22 drops of resin hardener ( the instructions call for 30 drops - 10 drops per ounce).
The altered hardener ratio is to slow down the catalysis that hardens the bondo and resin, giving me some extra time to coat the inside of the helmet.
 
I mixed the Bondo and hardener, and the mixed the resin and hardener. Finally, I mixed the two together to form the Rondo. The resulting consistency is the thickness of pancake batter. 
 
The Rondo gets poured into the inside of the helmet, and then spread with a rotomolding sort of motion (that means rotating the helmet while tilting it to cover the desired surface).  It took two rounds of Rondo to completely coat the inside of the helmet:


First coat completed

Second coat completed

Between the first and second coats, I plugged up the eye holes and breathing hose holes to minimize any drippy mess like so:

See no Rondo, Hear no Rondo, Spew no Rondo

This stuff cures exothermically, meaning the damn thing gets HOT! It's hard to do, but if you're stubborn or insensitive to painful stimulus, you could burn yourself, so use a little caution when handling the helmet as it's curing. I had about 10 minutes of working time with the mixture listed above, which is just about perfect for this kind of job.

If you're familiar with Shawn Thorrson's blog, you probably know that he likes to be able to do step aerobics on his helmets. While cool and photogenic, it's not something I'm into. One complete coat of Rondo seems to be plenty for this build. So, once this is completely cured and cooled, I'll move onto smoothing the exterior and prepping for the final finish. I'm still dithering about whether to make this a one off, or make a mold helmet and produce clones... Oh well, I'll burn that bridge when I get to it.


Monday, June 3, 2013

At long last, RESIN!

So-

Way back in December I started messing around with Pepakura, specifically helmets from Games Workshop's Space Marine™ universe. After hacking together a Mark III and a Terminator helmet, I finally did it right with the Mark VII:


The other two are perched on my computer room window sill as a testament to my rather pedantic manual dexterity skills.

Finally today, only 6 months later, I finally got around to taking the next step, applying fiberglass resin!

 Mk VII and equipment in ready mode

As I said when I blogged about this the first time, I got sucked into this after stumbling across Shawn Thorsson's blog When My Brain Leaks, the Drops Drip Here. Shawn has a wonderful step by step walkthrough of this process here. I'm going to give you the Reader's Digest version...

In the picture above, you'll see everything you need:
  • Pepakura model, in this case the Mark VII helmet
  • Fiberglass resin with hardener (which is hiding under the white cap)
  • Graduated mixing cup
  • Chip brush. Pro tip - buy the cheap ones, because the resin is really hard on brushes
  • Gloves - you don't want this stuff on your hands. Nitrile gloves are cheap, impervious and  and grippy
  • Wax paper coating the work surface. The resin sticks to everything, and once hard doesn't like to let go. The wax paper will keep you from wrecking your model when you try to pry it off the table.
You'll want to perform this job outside, or in a really well ventilated space. Huffing resin fumes is a great way of killing brain cells.

The process is pretty straightforward. Measure out the amount of resin you'll need. In this case I ended up using about 6 ounces to coat the whole helmet inside and out. Then add the hardener. #M resin asks for 10 drops of hardener to one ounce of resin. Be sure to read the instructions and use the right amount for your resin brand. Too little and it'll never harden right. Too much and you'll have a mixing cup resin popsicle. Mix the resin and the hardener thoroughly, and then brush onto the model.

Some folks do just the inside, some just out. I did both sides because I had enough, and I really wanted to make sure the paper was impregnated. The point of this step is to make the model stiff enough to take the Rondo mixture that comes next without deforming.

The result should look something like this:


See, I told you the hardener was hiding in the cap...

Note the mottled appearance. That's good, as it means the resin is soaking into the paper.

Now it hardens, and puts the lotion on its skin, or it gets the... oops! Wrong blog.

Once it's hardened completely, the next step is to coat the innards with Rondo, a mix of resin and Bondo body putty. So stay tuned for more mess!

Tuesday, May 21, 2013

Distractions ate my productivity....

I keep meaning to get back to some of the big projects I've started (like finishing my Pep Space Marine Helmets), but fun stuff and minutiae keep getting in the way.

One reason for this is that as soon as my friends heard that Colossus has taken up residence, they started coming up with clever things for him to create. A gardener friend lamented that she was having trouble keeping the snails out of her potted plants, and though that I should come up with a solution for her. So I came up with this:

Snails Beware!
I call it a SnailGuard (catchy, eh?). The modular construction makes it easily printable on most 3d printers, and allows assembly in a number of shapes by connecting them together using the little stakes pictured. The stakes act to hold the gadget in place, as well as together. I've also created a straight piece to allow assembly of non-circular shapes for larger or odd shaped containers. I'll be posting the files on Thingiverse soon if you'd like to download and make your own.

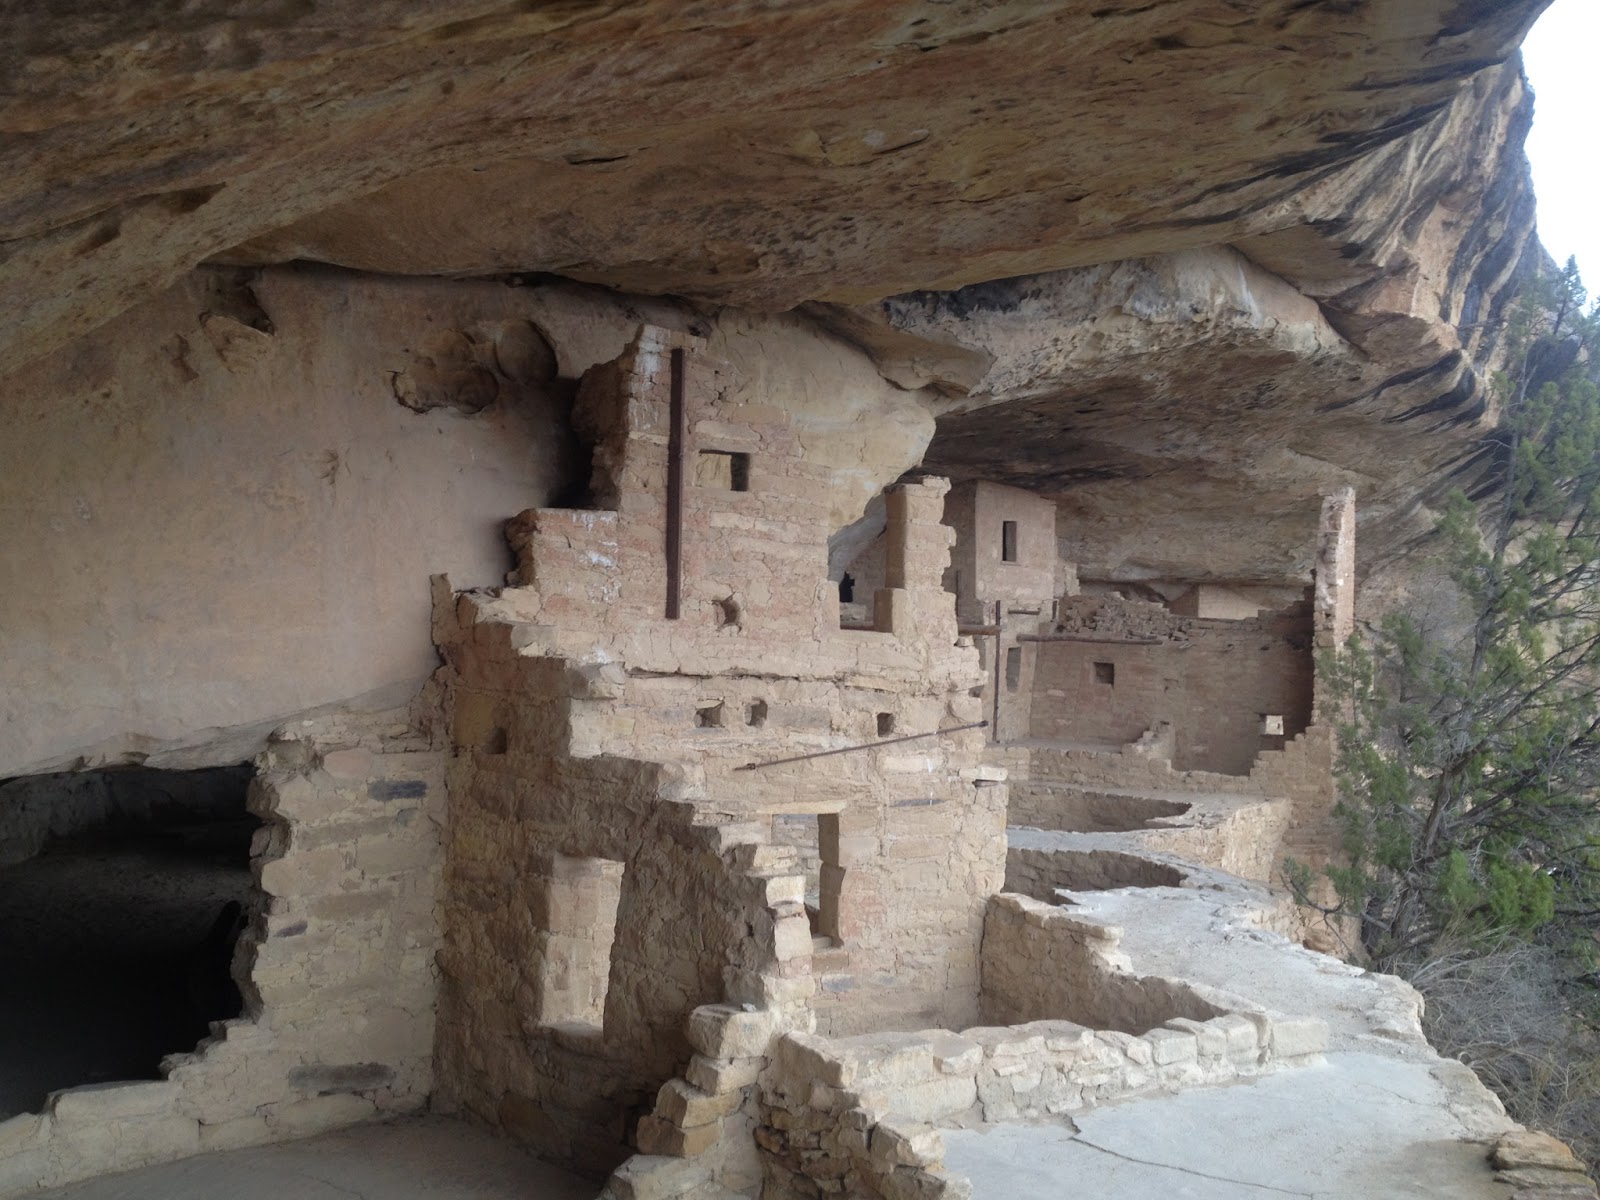
Another distraction was the chance to cross off one of our bucket list items, a trip to Havasupai, at the south rim of the Grand Canyon. If you're willing to do the ten mile hike down and back, it's a sight that is well worth seeing. We took the long way there in order to stay over in Durango, Colorado and visit Mesa Verde National Park, another must see destination. We hit the Four Corners monument along the way as well.

Balcony House at Mesa Verde

The Four Corners Survey Marker

Havasu Falls, Havasupai

 Hiking Havasu Creek among the lush mountain grape vines

Walking up creek towards Mooney Falls

And of course, I am my own worst distraction.... 

After coming home from Havasupai, I began to do some spring cleaning in the garage shop. I had recently purchased some parts bins from that one home place, and when I got them home I found that the manufacturer had decided that bin dividers were an accessory for which I ought to pay extra. Well, that wasn't happening. Colossus and I whipped up some of your own custom bin dividers. Two sizes, small and large!

Small bin divider, customized!

 The divider in place

 Poco y Grande, !Ole!

These will also go up on Thingiverse, but without the custom maker's mark. I'm vain, but come on.

Tuesday, April 16, 2013

New bees and more things!

As I mentioned before, my wife and I keep bees. This last winter was particularly harsh, and we lost all three hives. As a result, we are starting over this spring with two new hives. Here are our new girls.


They are in their new homes, and happily breeding. We'll be feeding them til the nectar runs. More pics next week!

On a related note, we think our hives did poorly because of too much moisture. There's an old tip to increase ventilation in hives - you glue popsicle sticks inside the outer cover to raise it up about an eighth of an inch, allowing the hot moist air to vent out. Problem is, it's hard to get the sticks off when you don't want them.

So, I came up with an alternative: removable bee vents!


I created these doodads out of PLA on Colossus (my M2 3D printer). You snap four of them into place on top of a brood or super hive compartment, and then add the inner and outer cover. The space allows moist air to vent out, but the space is too small for bees to get in or out of. This avoids robbing behavior (bees from other hives swiping honey). Like my outdoor light spike, I posted this on Thingiverse.

Thursday, March 28, 2013

Dr. Phil's mysterious ring...

OK, here's the complete scoop on the other 3D printing project that just came off of Colossus' hot little bed. What you see here is a 2 piece ring set holding a rubber dam. The dam is from a Zeiss scientific microscope.The idea and design behind the dam belongs to Phil Erschler,  PhD. Phil works with my wife at the Cardiovascular Research and Training Institute (CVRTI) on the campus of the University of Utah.

 Phil's mysterious ring, in position


The story:

Phil and I have been friends for years, and he's one of the few people I know who's a bigger geek than I am. Phil is the reason I have my new M2. At Christmas time we got talking about 3D printing, and he loaned me a copy of the MAKE Guide to 3D Printing. I ended up buying my own copy (who says piracy costs money?) and after careful consideration (read: about 10 minutes) I ordered Colossus.

Phil's first printer project is the ring retainer system you see here. It solves a serious problem with the Zeiss microscope in a rather elegant manner. This particular microscope is used to view tissue samples. The scope uses oil to change light refraction and improve image quality. The dam is supposed to protect the internals of the scope from the oil. Unfortunately what the folks at CVRTI observed is that the dam tends to buckle under the weight of the oil, allowing it to fail. 

Phils' ring solves that problem by stiffening the ring around its perimeter. Additionally, Phil created a central plug for the dam.

The assembly from the other side


The assembly installed on the microscope


It's a bit hard to see, but the really cool thing about Phil's solution is that he created two rings - a thicker support ring with a flanged lip, and a second thin ring that grabs the lip of the dam and sandwiches it between the two rings.  This required careful measurement of both the diameter of the ring, and the thickness of its lip. It further required a precisely calibrated 3D model and a correspondingly precise print. All told, I think we went through three iterations of prototyping print candidates to get to the final version. That's phenomenal when you think about the potential cost of doing this with conventional machining technology.

Nice work Dr. Phil, and thanks for letting me be a part of a cool solution.